Sunday, January 29, 2012

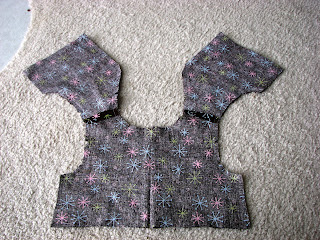
Weekend Project: Making the 1912 Project My Own

Be yourself.  Above all, let who you are, what you are, what you believe, shine through every sentence you write, every piece you finish.  
~ John Jakes


As you know, Janyce of the Vintage Pattern Lending Library is hosting a major project to digitize and sew all of the patterns that were published in “La Mode Illustree” (a French pattern magazine) in 1912. 

This is in honor of the 100th anniversary of the sinking of the Titanic.

Approximately 350 people have volunteered to serve as test sewers on this project, and I am one of them.

A Facebook page has been set up and there has been a lot of chatter as the volunteers ask questions and get to know one another.

Some of the people are seriously experienced and incredibly skilled in historical sewing and plan to apply historically accurate techniques to historically accurate fabrics in order to make museum-quality reproductions.

“Not it!” ;)

Others plan to make wearable garments for themselves.

Have you SEEN the waists on the women in 1912? (Okay, I realize that there were corsets involved, but still…) I have one of those waists. Heck, I have THREE of those waists!

Let’s face it – the typical pattern from 1912 does not suit my silhouette or my style. (Remember – this is the brightly-colored-hearts-flowers-and-kittens-print sundress girl here.)

So, how do I make this project my own?

Well, allow me to introduce you to the new member of our household and my model for this project: Mattie.


(This is actually a publicity shot for Mattie and her sisters - my Mattie hasn't made her appearance yet.)  


Mattie is a “BJD” or ball-jointed doll. She has (roughly) the proportions of a young woman, scaled to 1/3 size. And I will be sewing my assigned 1912 patterns for her. :)

The world of BJDs is new to me – but here is what I discovered with a little exploring on the internet:
  1. New ones are outrageously expensive.
  2. They are primarily made in Asia.
  3. New ones are outrageously expensive.
  4. Typically they have to be pre-ordered and delivery can take 3 months or so.
  5. New ones are outrageously expensive.

And by outrageously expensive, I mean in the $750 - $2,000 range! For a doll! Yikes!

Luckily, like everything else (with the possible exception of husbands), they can be purchased used on eBay. ;)

How did I come up with Mattie’s name? Oh, I just picked a random name that I liked…

I certainly did not estimate that, if she was in her early 20’s in 1912, then she must have been born in the 1890’s, and then Google popular girl names in the 1890’s to find one that I liked. I mean, come on, how OCD would that be!?!?

The name “Mattie” was ranked #50 in the 1890’s, by the way… ;)


Finally, one last detail, we have the option of downloading our patterns electronically and working with them in PatternMaker software


I downloaded the (free) basic version – but I think that even the basic version will allow me to re-scale and/or re-size the patterns relatively easily. (Fingers crossed!)

So, there it is in a nutshell – my plan. I will be making smaller versions of the 1912 patterns for Mattie and blogging about my adventure here, all year long. Wish me luck!

PS – While Mattie is definitely more chic, classy and sophisticated than I am, she does harbor a small guilty attraction to bright colors and happy prints, so those may creep into some of her garments in unexpected ways… ;)


Friday, January 27, 2012

Friday Confession


So, today's topic is not just a fun question - it's a real confession.  I have got a tool in my sewing room that I have never used.  :(

It is the complete set of Creative Feet.  I got them last year at the Original Sewing and Quilt Expo when it was in Lakeland, Florida.  

I keep meaning to try them out, but I haven't done it yet.  I hate buying things and then not using them.  

How about you?  Is there anything in your sewing room that you don't use?  How do you make sure that you only buy things that you use?  

Thursday, January 26, 2012

Talk Back Thursday

Image from the book "Sew It In Minutes: 24 Projects to Fit Your Style and Schedule" by Chris Malone.  Thanks to Claire for the pointer!  :)


Thank you so much to Claire, BConky, Draculash, Elaina, Webfrau, Mamafitz, Carla, Patsijean, Prttynpnk, Linda, Shannon, Mary, Becky and Gwen for talking back to my confession last week!  :)  I asked about “chain-stitching” (although I wasn’t aware of the official term until reading the comments!). 

I recently tried it when making 9 wine totes and 9 casserole totes assembly line style and liked it.  I asked what others thought of this technique.  

When it comes to sewing garments, people were fairly evenly split between voting "yes" (4), "sometimes" (3) and "no" (3).  The most commonly called out reason to do it is exactly the reason that I did it - sewing multiple copies of the same pattern.  

BConky, for example, sewed 9 sets of Christmas PJs for her grands a couple of months ago.  Prttynpnk used to sew and sell scrub caps and Mary makes boxers for her DH in batches.  And Shannon learned the technique doing production sewing for her aunt's clothing business.  

But some people use it even when they are not making multiple copies.  Patsijean, Linda and Shannon, for example, explained how they do it when sewing a single garment - like chain stitching shoulder seams or side seams, and chain-serging to finish the seams.  

The advantages that were cited include saving time, saving thread and protecting the edges of your fabric from being "eaten up" by the feed dogs.  

Several people (4, in fact) said that chain stitching is a mainstay technique in quilting - which is, when you think about it, another place where you are doing multiple copies assembly line style.  And Webfrau pointed out that it's particularly good when you are trying to deal with little pieces of fabric - again, protection for those pieces from the hungry feed dogs!  ;)

But, as you saw from the initial counts, not everyone does it.  Some people rarely find themselves sewing more than 1 garment at a time.  And others, like Elaina, are perfectionists when it comes to their garment sewing, and prefer to focus on each seam, one at a time.  

Thanks again to everyone who took the time to leave a comment with your thoughts!  :)

Wednesday, January 25, 2012

In the Queue Wednesday


Before Christmas, Christie of Fabric Shopper Online held a charity raffle, and I won one of the prizes!  My prize included a gift certificate to FabricWorm and with that certificate I picked out these 3 fabrics.  

I'm imagining a skirt with the body made of the large flowered print (displayed on the top) and either a yoke or a bottom flounce out of one of the other 2 fabrics.  

I would use the final fabric to make a short sleeved button-up-the-front blouse to go with the skirt.  

The colors are a bit darker than I usually get, but I like them...  What do you think?

I don't have the specific patterns picked out yet, and what with the 1912 project starting up, I have no idea when I'll get around to this.

But, don't worry, I'll get to it.  It's in the queue...  :) 

Sunday, January 22, 2012

Weekend Project: Seeing Triple

The best things in life come in threes, like friends, dreams and memories.
~ Anonymous

Well, I finished my first "project" from the One-Yard Wonders book - matching tops and skirts for the 3 baby girls that are in the process of arriving in the families of the people in my work group.  The one who has already made her appearance is Adalyn, who is about 5 months old.  Evie and Lena are due this spring.  I made the smallest size in the book - 2T - so it may be a while before we see these modeled!  ;)

The skirt was super simple - no pattern pieces needed - just the dimensions of 2 rectangles.  One rectangle (cut 2) makes the front and the back of the skirt.  The other rectangle (cut 1) makes the waist band.  The skirt is pleated and has an elastic waist.  


The lined tops - which I showed a bit of last weekend - came out to be adorable!  Here is the complete outfit (for Adalyn) from the front:  


And the back - with big, green buttons!  :)


And here is Evie's outfit from the front.  (Evie's Mom - who, despite what I am about to tell you is a very good friend - doesn't like pink!)  


And from the back with matching blue buttons:  


And finally Lena's outfit from the front:


One feature that I really like about the top pattern is how the ruffles are only along the sides.  It just seems like a slightly unusual and nice details - rather than having ruffles all the way around...  


I couldn't find matching pink buttons, but I found a translucent orange button that fits within the whole color scheme.  :)

Are these cute, or what?  :)

And they were so much fun to sew...  

Which leads to the question that has been plaguing me lately:   What am I doing participating in a project focused on historic haute couture, when I am so clearly a bright-cotton-print-sundress kind of a person?  Yikes!  

Oh well...  I guess I should think of it as a "stretch goal" instead of as taking on something that is a mismatch for me, right?  Maybe by next weekend I'll be able to show you my first Vintage 1912 assignment.  

In the meantime, I hope you had a wonderful sewing weekend and are ready for a new week!  :)

Saturday, January 21, 2012

1912 Sewing Project Update

I haven't received my first assignment yet, but if you want to get a look at some of the first patterns that we will be tackling from La Mode Illustree - browse through the links on this site!  :)
(You need to click on the title of a post to get to see the pictures.)  

Friday, January 20, 2012

Friday Confession


Remember when I was making all those wine and casserole totes for my friends a few weeks ago?  I did them assembly-line style, and I tried this "quick sewing technique."  Instead of stitching each seam independently (and trimming the threads, etc. before moving on to the next piece), I just kept feeding the next piece under the machine foot as soon as the previous piece was clear.  

It worked really well for things like doing all 18 handles - 18 versions of the same pattern piece.  This was a time when I didn't have to think about the next seam, because they were all the same.  

I'm not as convinced that it would work well for assembling a single garment - where you rarely sew the same seam more than twice (2 sleeves, 2 shoulder seams, 2 side seams, etc.).

So, how about you?  Do you sew like this?  If so, when - on lots of projects, or mostly just when you are sewing multiple copies of the same pattern pieces?  If not, why not?  Any suggestions or recommendations?  Any other "speed sewing" techniques you can recommend?  

Thursday, January 19, 2012

Talk Back Thursday


Thank you so much to Gwen, Becky, Elaina, Marie, Katherine, Mamafitz, Mary, Patsijean, Linda, Carla and Mrs. Mole for talking back to my confession last week!  I confessed that I resorted to (what I thought were) desperate measures when sewing dozens of rectangles together to make all those wine and casserole totes – in order to get my rectangles to line up nicely, I held the fabric tightly and “helped” it move through the machine. 

As usual, we got a ton of good information from the commenters!  Gwen kicked it off by explaining that we are really dealing with a somewhat complex system that has at least three variables. 

The feed dogs (under your fabric) are doing their job and “marching to their own drum”, so to speak, pulling the bottom layer of fabric (primarily) along. 

Then there is the presser foot pushing along the top layer of fabric – and its impact depends on things like how tightly it is pressing down on the fabric.

But all of these things can change, depending on what type of fabric you are working with! 
So, the odds that 2 equal length pieces of fabric that start together are also going to end together fall somewhat short of the 100% that we would like to see!  ;)

Of course, a couple of people pointed out that sometimes we can take advantage of this – something we’ve talked about before – the feed dogs usually move the bottom layer of fabric a bit faster than the top layer, and so they will help ease a longer piece (placed on the bottom) into a shorter piece (on top). 

But sometimes we have to overcome this “feature.”  And, as far as my 2 suggestions for how to overcome it, I had one hit and one strike.  ;)

While a couple of folks didn’t really have a strong opinion either way, holding the fabric tight – or, “taut sewing” as (I learned) it is officially called – got a big thumbs up from our commenters.  Seven people wholeheartedly approved of it.  And Katherine even said that it has the David Coffin seal of approval!  In fact the only potential negative that was mentioned was the stress it can put on your shoulders and back.  Linda reminded everyone to take the time to stretch when you use this method. 

Several people had suggestions for exactly how they do it.  For Patsijean, it depends on the length of the seam to be sewn.  For shorter seams, she only holds the fabric taut in front of the needle.  For longer seams, she holds it taut both in front of and behind the needle. 

Mrs. Mole learned taut sewing on a sewing factory floor and she adjusts her hold every 12 inches or so. 

When Gwen is using taut sewing, she lifts the presser foot every few inches to let the fabric relax.  She mentioned that having a knee-lift on the machine (something I never understood before!) makes this easier. 

The topic that elicited a bit of disagreement had to do with the use of pins in taut sewing.  Some folks advocate using pins and at any given time are holding the fabric taut up to the next upcoming pin.  And Elaina often relies on heavy pin use (or, in her words, she “pin[s] the goober out of it”) instead of taut sewing.  

But not everyone feels this way.  Mrs. Mole, for example, said that there were no pins used on the sewing factory floor – not only did she do taut sewing without pins, but she even used to use her fingernails to trim threads.  

Now, my second idea - “helping” the fabric move through the machine – wasn’t quite so well received.  To put it mildly!  ;)

Most everyone who commented on this gave it a big: N.O. 

The two exceptions were Becky, who sometimes does it a little bit, but is extremely careful to keep her pressure smooth and even, and Linda, who only does it to help the machine get over bulky seams.  Speaking of bulky seams, has anyone ever tried presser foot spacers to help with bulky seams?  They are pictured above, and I found them at this website.  

And the reasons for not pulling or pushing on your fabric included: breaking needles flying everywhere (What?  You don’t enjoy a bit of danger and excitement in your sewing room?) and pitting your needle plate.  I have also heard that, if your machine is computerized, you could pull it out of alignment.  I’m not sure if that applies to 100% mechanical machines too or not… 

So, my take-away from all this is that I am going to try to deliberately use taut sewing more often, and I am going to try very hard to NOT control the fabric’s movement through the machine…  Wish me luck!  :)

Thanks again to everyone who took the time to leave a comment!  You guys rock!  :)

Wednesday, January 18, 2012

In the Queue Wednesday


Just in case there is any remaining doubt, I think this has finally settled it - I am crazy!  ;)

Why?  Well, I have joined my first "sew-along" so to speak - and it's not for a spring wardrobe or anything useful (and normal) like that...  


Nope.  I have joined the 1912 project.  

Janyce of the Vintage Pattern Lending Library is organizing this project in honor of the 100th year of the sinking of the Titanic.  

She's going to be "transcribing patterns, graphics and information from the 1912 editions of La Mode Illustree – a beautiful French fashion journal of the period – with the goal of making all of the patterns from the entire year available."  

And she's looking for test sewers who will sew these patterns and blog about their experiences.  

And I've signed up!  Yikes!  ;)

It's really Elaina's fault - she's the one who told me about this project.  ;)


So far, almost 350 people have asked to participate.  Janyce set up a Facebook page for the project here.  If you are interested, I'm sure it's not too late to sign up.  :)

So, I don't know exactly which project will be in my queue - but it's something from high fashion 100 years ago!  I can't wait to see it and share it with you!  Don't worry, I'll get to it.  It's in the queue...  :)

Monday, January 16, 2012

Weekend Project: Toddler Tops

The reverse side also has a reverse side.
~ Japanese Proverb


I've been having a wonderful time this weekend diving into the patterns in this book - one of my Christmas presents.  


I started with a lined top for a toddler.  Three of my friends at work have (or are about to have) a little girl and so I'm making 3 of these tops.  The instructions for making the lined top are okay, but not well illustrated, and if you have never done this before it could be confusing.  Here are some photos illustrating the steps using the 3 different tops that I am making:  

After assembling the outside layer (front piece to 2 back pieces at shoulder seams) and the lining layer (same way), you lay them right-sides-together and stitch:
(a) the arm hole seams (but not the side seams)
(b) all the way up one back center edge, around the neckline and down the other back center edge

Do not stitch any of the bottom seams.  


Then you turn it right side out by pulling each back piece through the opening in the shoulder.


And press it.  :)


Here I've draped the shoulder over my ham and you can see the 2 side seams:


I stuffed some tissue paper inside, to show you how the side seams are open:


Imagine opening upwards the outside layer of each side seam and aligning those together in one long seam.  That's what you are seeing below (sideways):


This gives you one long seam that aligns the sides of the outside fabric and the sides of the lining fabric and, once sewn, closes up the side inside and out.  :)


Hopefully by next weekend I can show you the completed tops AND the matching skirts that I am making.  :)

I hope you had a wonderful sewing weekend!  

Saturday, January 14, 2012

Weekend Project: Giving Away Sewing Books


Thank you for all the kind words about my blog and reaching 800 posts!  

I split the commenters into 2 piles - those who were interested in the PR 1,000 Tips book and those who were interested in the BurdaStyle book.  

If you said "both" then I put you in the PR 1,000 Tips group, because there were fewer people in that pile and so I figured it gave you better odds.  ;)

(I'm guessing that fewer people called out the PR book just because it's been out longer, and so more people already have it.)  

Then I randomly drew one name from each pile.  And the winners are:

PR 1,000 Tips

BurdaStyle

Congratulations!  

Shoot me an email, gwendolyn_campbell@hotmail.com, with your address and I'll get your books in the mail ASAP.  :)

I wish I could send books to everyone...  March 11th will be my 4 year blog-i-versary, and I'll have another give-away to celebrate that.  :)


Friday, January 13, 2012

Friday Confession


I was taught (lo, these many years ago) to be careful to only use my hands to GUIDE the fabric through the sewing machine, but to let the sewing machine do the actual work of moving the fabric.  

And for the last 10 years one of the things that I could never do well - something that seemed like it should be simple - was sewing large rectangles together.  They would always start out lined up nicely, and then end up out of alignment - often with little fabric bubbles.  Even when I used my walking foot (although that did help).  

Making 9 casserole totes required sewing A LOT of large rectangles.  So I tried something new.  I held the fabric taut and kind of pulled it through my machine.  At first it felt wrong - but, you know what?  It worked!  My rectangles came out nicely aligned with basically no fabric bubbles across all 9 totes.  :)

It may help that my machine is mechanical, not computerized.  

So, how about you?  Are you careful never to push or pull your fabric through the machine?  Or do you sometimes take control?  What do you think about this?  

Thursday, January 12, 2012

Talk Back Thursday


Thank you so much to Elaina, Lynne, Mary, Carla, Linda, Marie and Patsijean for talking back to my confession last week.  I confessed that I hadn't done a year-end review of my sewing in 2011, nor had I made any sewing-related resolutions for 2012.  Those things were feeling stressful to me, and I asked if others participate in these traditions.  

On the surface, we got the usual variety of responses - some saying "yes" and some saying "no".  But, looking a little deeper, I think that a powerful, common theme emerged.  

First, the influence of the internet:  Several people reported that they did at least some wrap-up and new year planning, in large part due to reading other sewing blogs and/or working on their own blogs.  

Second, no one thought that hobbies should be stressful - but they ARE about learning and growing and stretching and excelling...  So, while some people said "No" to setting traditional resolutions for their sewing - like "producing x garments per month" or "sewing for y time every day" - many people are feeling inspired and striving to improve in some way.  

For example, Elaina is hoping to do more sewing in 2012 than she was able to do in 2011.  Carla is continuing her longtime quest to learn how to alter patterns for the perfect fit.  Linda is planning to focus on finishing many of her UFOs (and 'PIGS' ??  That's a new one to me...).  Last year, Marie tried to use more fabric than she bought.  And Patsijean is really excited about her plan to do a SWAP this year.  In fact, she has already planned the projects, shopped her stash for the fabric (with one exception - the beautiful spoonflower print pictured above), and started the first jacket!  

So, what's the theme?  Well, when it comes to our sewing, it isn't about making a list of "shoulds" and feeling guilty when we can't keep them.  It's about being inspired and excited and passionate.  :)

Apparently the idea has been around for a while.  Lynne provided the most beautiful and powerful quote to summarize this - by Aristotle!

"Pleasure in the job puts perfection in the work."  

So, I guess I WILL set a "resolution" for 2012.  I will try to live by Lynne's motto and follow Aristotle's advice...  :)

Thanks again to everyone who took the time to leave a comment!  Here's wishing a wonderful sewing year for all of us!  :)

Wednesday, January 11, 2012

In the Queue Wednesday


You've already seen this project - it was a Christmas gift from Ana.  :)

She picked out the pattern, the fabric - even a contrasting fabric for the yoke - and got me matching thread and a zipper.  I love it all!  

I'm almost as happy about the fact that she did it all by herself!  I remember the first time she ever stepped foot into a fabric store - I took her to pick out the fabric for her first sewing lesson.  She didn't speak English and it was all new and strange to her - the books of patterns, the file cabinet of patterns, the rows of fabric, having the fabric cut, reading the table on the back of the pattern to figure out how much to buy and what size zipper to get - it was ALL as foreign as our language...

Now she can do it all herself.  She can waltz into Joann's, go straight to the pattern books, find a picture she likes, pull the pattern out of the file cabinet, select the fabric(s), wait in line to have it cut, tell the woman behind the counter how much she wants, pick out the required notions, and then pay for it all.  She is comfortable and confident and speaks easily in English with the people who work there.  

Of course, I don't get credit for teaching her English - she went to school to learn that.  But I do think that practicing with me and my husband helped her gain confidence outside of the classroom.  

Anyways, every time I wear this skirt I'll remember that she picked it out for me and that it shows how far  she has come since that first day that we got together and I showed her how to thread a sewing machine...  

So, I'll be getting to this skirt soon!  It's in the queue...  :)

Tuesday, January 10, 2012

Weekend Project: Christmas Presents Finished!

He was always late on principle, the principle being that punctuality is the thief of time.
~ Oscar Wilde

I wish I could say that I was following some kind of principle when I was working on these Christmas presents last weekend (in January), but I don't like being late.  I just have a bad tendency, when making plans, to over estimate what I can accomplish and under estimate how busy I'm going to be...  

But - thanks to Ana's help!  - the last of my Christmas presents, 9 insulated casserole totes, were finished over the weekend and passed out at work yesterday!  :)

(I passed out the wine totes on our first day back to work after New Year's and those were a big hit too!)  


I'm sorry that the pictures aren't better - I had gotten up around 4 am on Monday to finish them up and was in serious danger of being late for work.  So I just grabbed a few snaps.  


You may remember that I had all my friends browse the website fabric.com and pick out 2 fabrics that they liked.  All I told them was that it was kitchen-related.  Each person told me his/her choices and I ordered the fabric and 9 Pyrex, 9 x 13 casserole dishes.  

Notice the little tab on the front to hold a spoon or spatula?  I considered buying each person a spoon, but I had already gone over any kind of budget, so I let that go...  


It was fun working with all those different fabrics.  The pattern was pretty reasonable.  About the only change that I made was a minor one - the instructions called for making the handles by sewing both side seams while the 40 inch strips were right-sides-together and then turning the tubes.  

I found that turning tubes that long was a bit tedious, so I only stitched one seam with the fabric right-sides-together.  Then I pressed under the other seam and top stitched the handle to seal it.  (The instructions called for top stitching anyways...)  


I also had fun deciding which fabric to put on the outside and which on the inside and whether to mix them a bit (like making the handles out of the contrasting fabric, etc.).  Hopefully each person will think that I made the best decision on his/her tote.  


They were a pretty big hit when I passed them out yesterday.  :)

We have semi-regular potlucks at work and most everybody does some pretty serious cooking, so I figured that these would be generally useful.  :)

Next year, I'm thinking of putting my new "One Yard Wonders" book out on the conference table and letting each person pick the project that he/she would like for me to make as his/her Christmas present.  And I will try to remember to start in September, not November!  Maybe, for once, I won't be late...  ;)

Saturday, January 7, 2012

Post # 800 !!! (Thank you & give-away)

Can you believe it?  I'm not sure I can...  My 800th post!

And that means - time to get all sentimental and mushy.  ;)

Okay, okay...  I'll try to keep it brief.  ;)

Thank you.  :)

Thank you for reading my posts - even though I am FAR from the best at sewing or writing out there.  

Thank you for commenting - even though I am horrible about commenting on the blogs that I read.  

Thank you for encouraging me when I mess up or get tired and discouraged.

Thank you for sharing your wisdom and insights and funny stories - to help me learn and to make me laugh and to make my Friday/Thursday posts worthwhile.  

Thank you for...  everything!  :)

The words are for everyone. 
And for two of you, I have sewing books!  

I will be randomly drawing 2 names from among the people who comment on this post.  One will win a copy of this book from one of my favorite sewing sites:  


And the other will win this book, from another of my favorite sewing sites:  


In your comment, let me know which book you are hoping to win.  
This drawing is open to everyone in the world.  (Not just U.S.)  

Good luck to everyone!  

And, again, thank you!  :)

Friday, January 6, 2012

Friday Confession


As I've been reading through the blogs in my blog roll for the past few weeks, I've been feeling more and more alone on this one...  but I have not taken the time to review 2011 or set specific goals for 2012.

Don't get me wrong - I know that periodically taking stock of where you are and looking ahead to where you want to be can be powerful tools for improving your skills.

And, unlike Calvin (above), I know that I still have a loooong way to go before I will be happy with my sewing skills...  If that thought slipped my mind, my recent dancing dress experience was a vivid reminder!  :(

But I'm just feeling so stressed - so much of my life is dominated by goals and timelines and evaluations...  Sometimes I just want my sewing to be fun and pressure-free.  Even though, in general, I do get a lot of satisfaction in achieving goals and improving my skills.  

So, do I sound as "house divided against itself" as I feel?  ;)

Okay already, enough about me!  ;)

How about you?  What is your stance on using the end of the year to taking stock and setting goals for your sewing?  Do you do it?  If so, why?  If not, why not?  If so, how was 2011 for you in your sewing? And what are you planning for 2012?