Thursday, November 18, 2010

Talk Back Thursday


Thank you so much to Mamafitz, Kristine, Angela, Summerset, Becky, Faye, Kelley, CarlaF, Sharon, Sarah & Tasia for talking back to my confession last week! I asked about grading seams and which layer you should trim shortest – or if it didn’t matter.

So, we did have a couple of folks who are a bit laissez-faire about grading seams – we got 2 votes for the “never or rarely do it” category and 1 vote on the “when I do it, I just wing it” category.

But most people converged upon 3 guidelines, with the most popular one being this:

1. The layer that will be closest to the public side of the garment should be left the longest.

Five people agreed that this is (at least usually) the right way to do it.

The two other rules-of-thumb that were presented (by 2 people each) were:

2. Trim the thickest layer (usually the interfaced layer) to be the shortest.

3. If you will be edgestitching or making a flat felled seam, make sure that the longest layer is able to trap all of the shorter layers inside (or underneath).

Summerset addressed the issue of “does it matter?” She doesn’t grade every seam, but advises that it does make a difference if you have multiple, thick layers of fabric coming together in a single seam.

Finally, as for the “how” to grade seams, Faye and Sharon gave this tip: Apparently you can just hold your scissors at an angle as you trim (or use appliqué scissors) and the seam comes out automatically graded. :)

Thanks again to everyone who took the time and effort to respond! You guys rock! :)

Wednesday, November 17, 2010

In the Queue Wednesday


Another pattern that called to me from the November issue of BurdaStyle - this dress. I like how the tucks in the bodice open into pleats in the skirt. I can see making it up in a warmer fabric and wearing it during the time that passes for "winter" in Florida. ;)


No appropriate fabric in my stash - looks like I'll have to go fabric shopping... Darn it... ;)


If I'm going to make it in something warm then I should get to it soon. In any event, I'll get to it - it's in the queue. :)

Tuesday, November 16, 2010

Tuesday's Torch Story


The great end of education is to discipline rather than to furnish the mind; to train it to the use of its own powers rather than to fill it with the accumulation of others.


~ Tryon Edwards


This week we reviewed our lessons on adjectives (e.g., tall) and comparatives (e.g., taller) and added superlatives (e.g., tallest) to the mix. One thing about our class made me happy and one thing made me a little unhappy.

The unhappy thing was that we didn’t finish the written exercise in time to do the spoken activity. For the written exercise I had made a worksheet with about 40 adjectives that they were to rewrite as comparatives and superlatives. It took people much longer to finish this than I had anticipated and so we never got to the activity where they had to actually speak in class. I think it’s really important that each class include practice speaking, and so I am kind of unhappy with myself that we weren’t able to get to it this week… :(

On the other hand, one of my major goals for my students was for them to become comfortable with and “fluent” using a Spanish-English dictionary. Many of them had never used one before they started attending this class. While I have designed many of our activities to require the use of a dictionary, it wasn’t necessary (and really wouldn’t even help) with this particular adjective worksheet. What made me really happy was seeing, as I walked around helping with the worksheet, that almost everyone was looking up the adjectives that they didn’t recognize and writing the Spanish translation on the worksheet as well.

I didn’t tell them (or ask them) to use the dictionary and the dictionary couldn’t help with the actual assignment. But they have come to view the dictionary as a useful tool and they have gotten enough practice with it so that they can use it quickly and easily whenever they want. And they are internally motivated to learn – not just obligated to complete the exercises that I put in front of them. I think this is a pretty big deal and it makes me very happy! :)

Sunday, November 14, 2010

Weekend Project: Size Estimations

An inebriated man in a bar was upset when his wife approached Truman Capote for an autograph. He staggered over to Capote's table, unzipped his pants, exposed himself and issued the challenge, "Since you are autographing things, why don't you autograph this?"


Capote replied,
"I don't know if I can autograph it,
but perhaps I can initial it."


---------------------


Of course, we're always told that "size doesn't matter." I hope it's true, because I did a very poor job of estimating the right size pajamas to make for Juana's baby Alex.


But first, let's go back to where the story left off last weekend... All was done except for the footies and snaps.


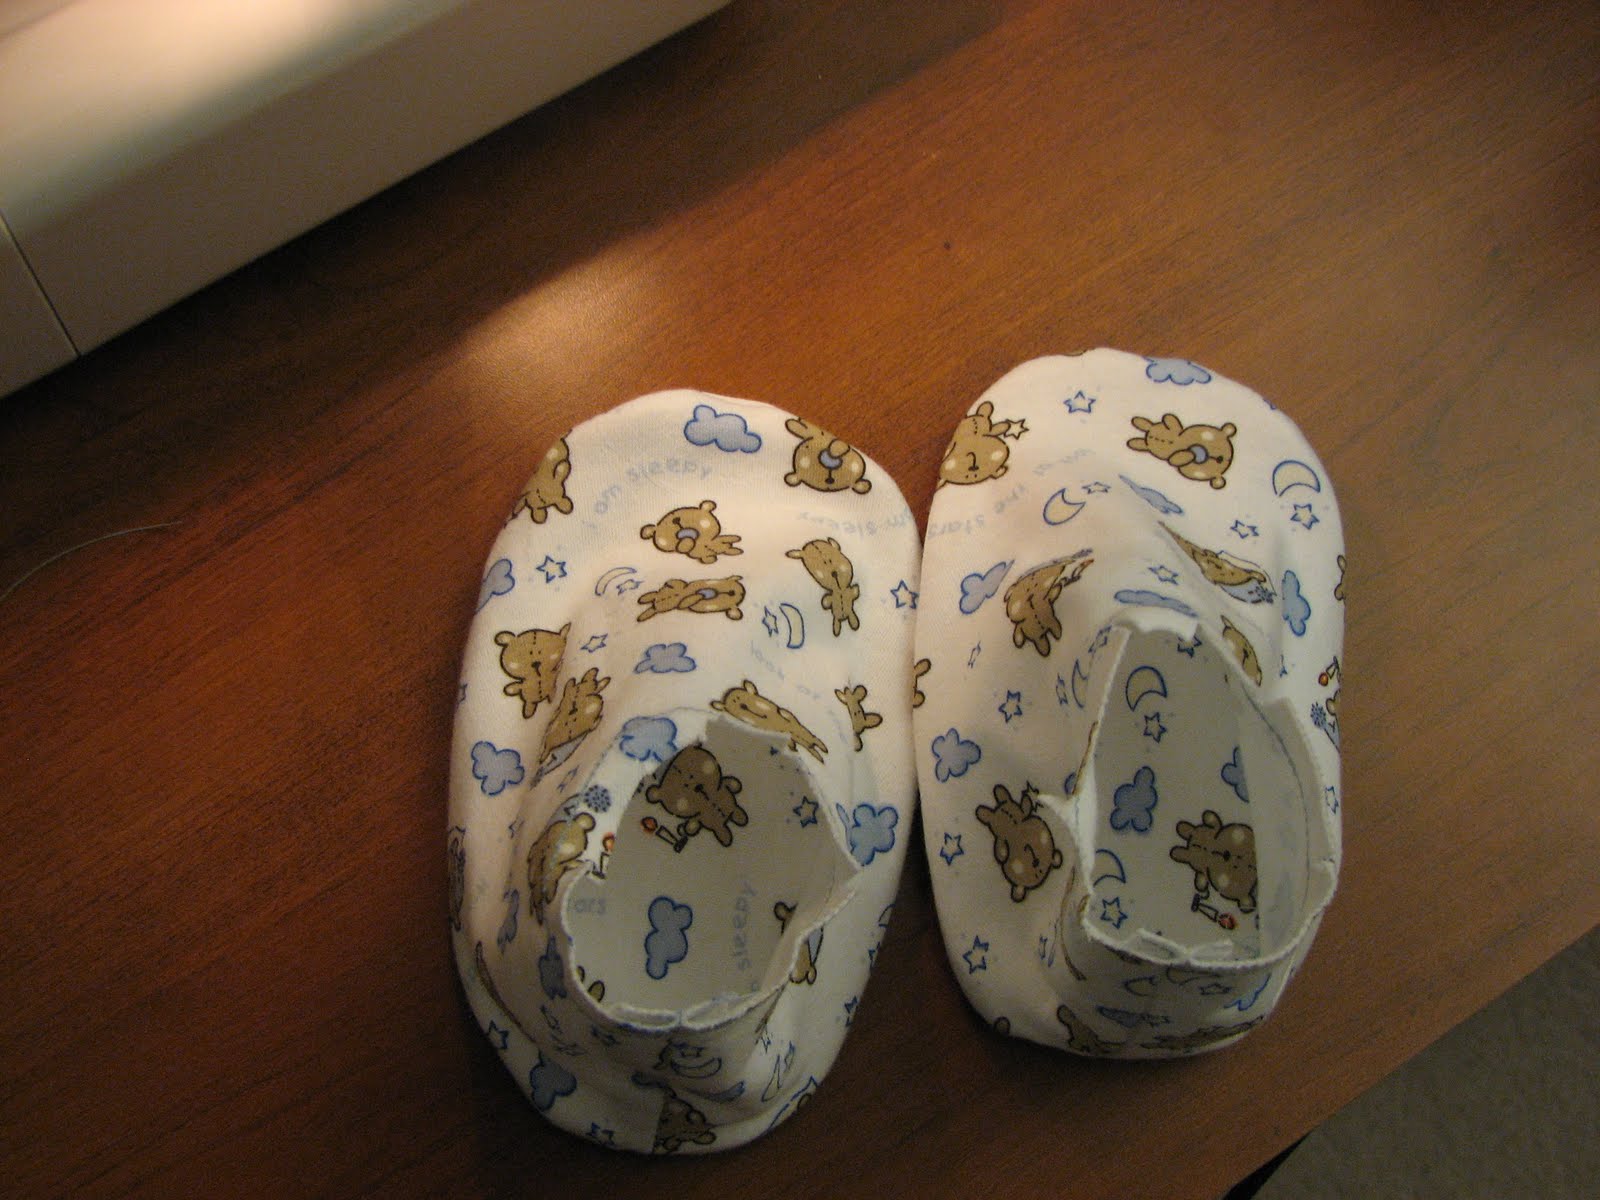
The footies (or booties?) are made up of 2 pieces. A sole and a piece that reminds me of spats from shoes in the olden days.


After closing up the back seam on the spats-like piece, you stitch it to sole.


Flip it right-side out and - behold! - two little booties ready to be attached to the bottom of the pajama legs.


The bottom of each pants leg had to be gathered to fit the opening at the top of the booties.


That left the last step - snaps. You may recall that I complained a bit about the instructions calling for 14 snaps to be sewn on by hand. Summerset recommended snap tape, and I was all over that idea in a snap...


(Sorry, I couldn't help myself....) ;)


I struggled a bit with which sewing machine foot to use. I found I could use the regular foot on the side of the snap tape with the little indentations. But I had to use the zipper foot for the other side with the protuberances. I also found that adjusting my needle position (my machine has 3 options - centered, to the left and to the right) helped me sew along the edge of the tape.


And now I will unveil the completed outfit and you can see for yourself what I mean about misjudging the size:


It is waaaaaaaaay too big for the baby. In fact, it's going to be quite some time before he grows into it.


Oh well, I suppose that, in the meantime, his Dad can wear it... ;)

Friday, November 12, 2010

Friday Confession


I get confused when I am directed to grade seams to different lengths. I'm never quite clear which of the seams should be cut shorter - or if it even matters... I usually try to make sure that the outer-most seam allowance layer is the longest, so that it can hold in all the shorter lengths, but I'm not sure if that is right.

And I wonder whether or not the thickness of each layer matters - for example, the interfaced layer versus the non-interfaced layer - should one be trimmed shorter than the other?

How about you? Do you have a system for always doing this the same way? If so, how do you do it? Do you think it matters?

Thursday, November 11, 2010

Talk Back Thursday


I couldn't find an appropriate picture for this post, so I'm substituting a cute picture of Oliver! I hope no one minds too much... ;)


Thank you so much to Summerset, Dawn, Debbie, Birdie, PhoebeGrant, LoisK and an anonymous commenter for talking back (even if it was ahead of time!) to my confession last Friday.


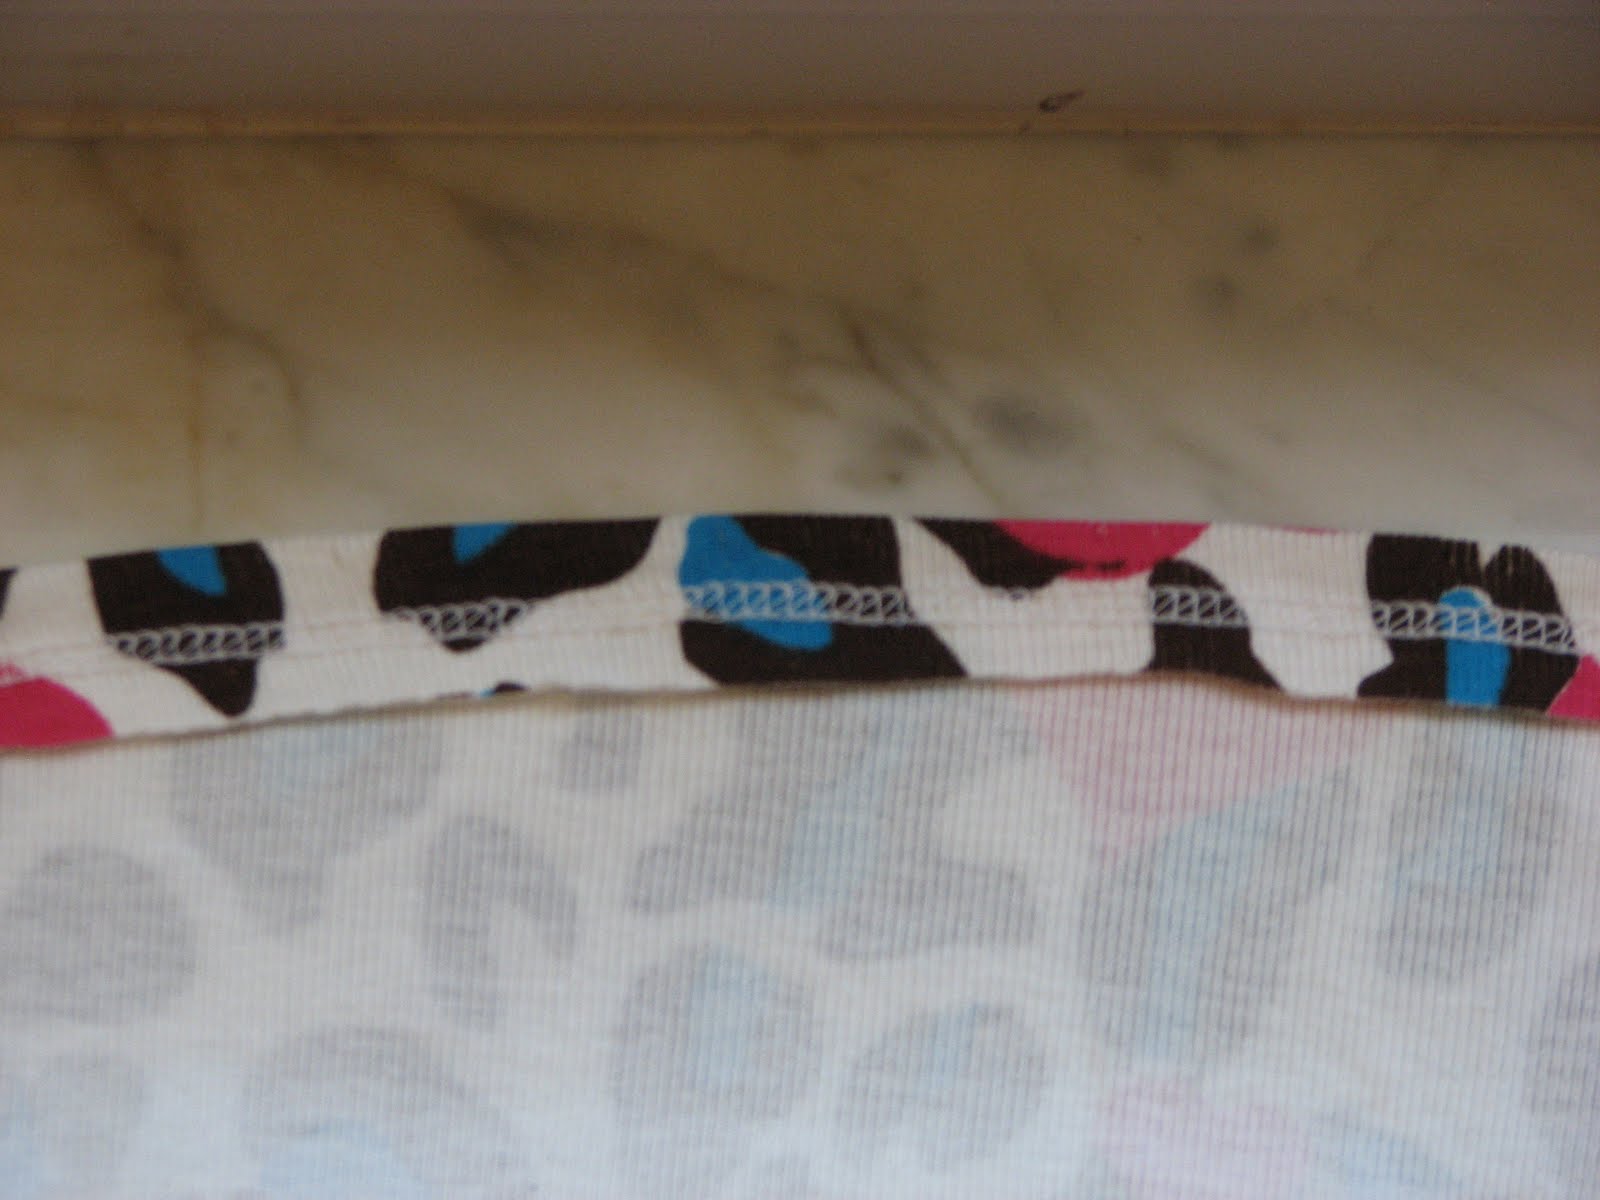
I admitted that I struggle with getting my cover stitch to line up nicely with the raw edge of my fabric on the inside of a garment – I usually have to trim away the excess fabric afterwards.


So, this topic brought about 100% consensus - everyone reported that this can, indeed, be tricky – mostly because, as Summerset pointed out, you can’t see the raw edge as you are stitching your hem.


While everyone agrees that it’s tricky, not everyone is equally OCD about it. For example, Dawn doesn’t stress out if it’s only off a smidge, and she and several others are okay with having to trim a little bit afterwards.


Other people go to more of an effort to get everything perfectly aligned from the beginning. Two main strategies were suggested.


Debbie, Birdie and PhoebeGrant all described in detail how they use careful measurements and make their own seam guides to help keep the fabric properly aligned. They did present some minor variations of the basic idea – but they all achieve the same good results!


Both Debbie and PhoebeGrant take measurements from the left needle to the bottom of the hem, and then attach something to serve as a guide for the folded edge of the fabric as they run the garment through the cover stitch machine (or serger). Debbie uses tape and PhoebeGrant uses something thicker – like cardboard or a stack of post-it notes. I got the feeling that Debbie may have her tape down such that the fabric mostly runs over it and PhoebeGrant puts her cardboard on the outside, so that her folded edge bumps up against it – but I may not have interpreted their comments correctly.


Instead of adding her own seam guide with tape or cardboard, Birdie uses the edge of her presser foot. She has found that the distance between the left needle and right edge of the presser foot is ¾ of an inch, so she irons her hems to 5/8ths of an inch and then uses the edge of the presser foot as her guide.


LoisK uses a second method – she folds over her hem and runs a quick hand-basted stitch 1/8th of an inch from the cut edge of the fabric (on the inside). Then she keeps this basting stitch centered between the two edges of the machine foot as she sews her cover stitch. In addition to keeping the cover stitch lined up nicely with the raw edge on the inside, it prevents rippling in the fabric (as the 2 layers are held together as they go through the machine) AND the basting stitch pulls out easily afterwards. Extra time – yes - but she loves how perfectly it works for her!


Finally, Summerset pointed out that it just takes practice. She used to do things like make seam guides and baste ahead of time, but now she’s done it so often that her fingertips just know how to guide the fabric through the machine in the right location.


I also asked if it would be likely to cause problems if my stitches fell off that raw edge and onto a single layer of fabric. Both Summerset and Dawn replied that you are likely to get a funny effect – tunneling or a ridge – due to the 2 needles going through different thicknesses of fabric. They both recommended erring on the side of needing to trim afterwards…


Thanks again to everyone who took the time to reply! I’m going to try your strategies and look forward to the time when it gets easier and I get better with practice! ;)

Wednesday, November 10, 2010

In the Queue Wednesday


The November issue of BurdaStyle just arrived and I found a couple of patterns that appealed. First up, these pants. It seems to me that their pants patterns usually narrow towards the ankles, accentuating the roundness of the hip area. My hips do not need any accentuation and so I look for wide legged trousers. I think that these might fit the bill nicely. :)


I did pick up some trouser material about a year ago on a shopping trip with Lori in central Missouri - maybe this is the pattern for that fabric...


The fabric has already been languishing in my stash for a year, so I'm not sure when I'll get to this project - but, don't worry, I will! It's in the queue... ;)

Tuesday, November 9, 2010

Tuesday's Torch Story

Students learn what they care about.
~ Stanford Ericksen


Last week’s topic was modifying adjectives to make comparisons. It turns out that there are roughly 4 rules (with all the usual exceptions) in English.

Short adjectives (typically meaning one syllable), get an “er” added to the end.
Tall --> taller

Of course, if the adjective already ends in “e”, you just add an “r”. I’m not actually counting that as a separate rule… ;)

If the last 3 letters of the short adjective happen to follow the pattern consonant-vowel-consonant, then you double the last consonant before adding the “er”.
Big --> bigger.

If the adjective ends in “y” (now typically making it two syllables), you change the “y” to an “i” before adding “er”.
Pretty --> prettier.

Finally, long adjectives (two or more syllables & not covered above) are modified by adding the word “more” in front of them.
Intelligent --> more intelligent.

And there is a set of common exceptions where the word changes completely:
Good --> better
Bad --> worse
Etc.

The system may not seem bad to native speakers, but keep in mind that there is basically only one rule in Spanish – add “more” (or “más” as the case may be) in front of the adjective. (Although they do have a small set of exceptions covering some of the same words as are in our set.)

So, I started by going over the rules, with examples. And then my 2 volunteers staged a kind of mock debate on Wile E. Coyote versus the Road Runner. Each took a side and they alternated making statements like “The Road Runner is faster than Wile E. Coyote” and “Wile E. Coyote is sneakier than the Road Runner.”

When they ran out of comparisons, one of my students shouted out that the Road Runner is tastier! The class got quite a kick out of that! :)

To be fair, “tastier” was one of the adjectives that we had used in the earlier drill, but it was good to see that it had stuck and he was able to put 2 and 2 together to express his sense of humor. :)

Then I wanted to have the class conduct their own debate. I thought a lot about the subject of the debate. I didn’t want to stir up strong emotions or controversy, which left out political and religious leaders. My friend Ana suggested that I use characters from a popular Hispanic show, El Chavo del Ocho (see picture above).


Ana assured me that everyone in my class was likely to be familiar with the show, even though I have students from a variety of countries (Puerto Rico, Mexico, Cuba, and several countries in South America).

Sure enough, the picture brought smiles of recognition to everyone’s face. The class self-divided into the women (5) against the men (4), and I assigned the main character of El Chavo to the men and another small boy, Quico, to the women.

I gave them 10 minutes or so to prepare their adjectives and then we started the “debate.” We got lots of standard adjectives and I was happy to see that all 4 of the rules were represented. Some of the comparative statements included:

thinner
more envious
smarter
clumsier
more arrogant
ruder
funnier
happier
more creative
more aggressive

I was also amused to see that both teams picked some of the same adjectives. For example, the men claimed that El Chavo was thinner than Quico, but the women claimed that Quico was thinner than El Chavo. If both sides used the same adjective, then I crossed it off and didn’t count it for either side.

My favorite story comes from one of my quieter and weaker students. She wanted very much to say that Quico cries more than El Chavo. Unfortunately, that’s a verb, so I proposed that she say that Quico is whinier than El Chavo. We looked up whiny in the dictionary, so that she could see the Spanish word and make sure that it was acceptable.

While looking over that entry in the dictionary, she happened to notice a nearby entry and its Spanish translation: "whimsical.” She got very animated and declared that Quico was more whimsical than El Chavo.

She was so excited by this comparison that, when we were having our debate she couldn’t contain herself and, as I was writing terms on the board, she came up to the front of the room and practically took the marker from my hand and wrote it on the board herself. (This from a woman who sits in the back and usually won’t even speak in class.) Then she proudly translated it for the rest of the class. It was great to see her so excited and proud! :)

In the end, the 5 women generated 14 unique comparisons and the 4 men generated 9 unique comparisons, so I pronounced the women the winners of our "debate". The men promptly grumbled that it wasn't fair, as they were outnumbered... ;)


It was a fun class and I'll reinforce the material with the addition of superlatives (thin, thinner and thinnest) in an upcoming lesson.

Sunday, November 7, 2010

Weekend Project: Teddy Bear Pajamas

I ran up the door and closed the stairs,
said my pajamas and put on my prayers,
turned off the bed and hopped in the light,
all because you kissed me goodnight.

~ Unknown

I had a chance to start working on this outfit for baby Alex this weekend. There were 8 pattern pieces - 9 if you count the fact that you need to cut the bottom of the foot piece twice (for 4 pieces).


The first step was to attach the raglan sleeves.


Next you stitch up the side seams and underarm seams.


And then the "aaaaw!" cuteness factor comes into play with the tiny cuffs at the end of each sleeve.


The cuff instructions were standard - before inserting the cuff you are supposed to baste its raw edges together. However the cuff had to be stretched to fit the end of the sleeve, and I found it difficult to stretch it sufficiently with the basting in place. So I ended up removing that.


Next was the facing around the front of the romper.


The instructions called for interfacing to be applied to the facing. I didn't bother, as the fabric I'm using is a stretch knit, and I think it turned out to be a good thing. As with the cuff, I had to stretch the facing quite a bit to get it to fit around the neckline - I don't think I could have gotten it to fit if I had applied interfacing...


All throughout this time, I had been wondering about the "legs" (or apparent lack thereof) for this romper. It is supposed to have legs, yet the back was one solid piece. The next series of steps were to remedy this situation. First, I traced the markings along the bottom center of the back, and stitched inside the lines to reinforce what was soon to become a seam.


Next I cut up the middle and made a kind of star pattern by clipping into the stitches in two places.


Then the instructions had me open out the back along this cut, and attach a rectangular piece of fabric.


Once it was sewn on, I folded it around and stitched -in-the-ditch, like a binding.


Now, you can see how the front and back will attach to make legs. Although I'm still not sure how it will all combine right in the center of the crotch area...


I'll just mention that the instructions had me cut 2 of the rectangular piece of "binding" for the back, and it appears as if I'm only going to use one of them...


The main steps left are getting the booties made and attached, and then the snaps. Hopefully I can finish it during the evenings this week, so that I can give it to Juana next weekend.


On the other hand, I made a medium (at her request), and he weighs around 7 pounds, so it's not like he's going to outgrow it any day now... ;)


I hope you had a good sewing weekend and are ready for another week!

Friday, November 5, 2010

Friday Confession


When I sew a cover stitch hem, I never seem to be able to get the stitches to line up along the raw edge of the fabric. I get so aggravated with myself! :(


One thing that might contribute to my difficulties is that I am constantly fighting the feeling that it would somehow be really bad if the stitches went too far inward and fell off the second layer of fabric.


I've already received some good advice from phoebegrant, Lois K, Summerset and an annonymous commenter - thank you to all!

But I would love to hear from others too. So, how about you? Do you have trouble with this too? Any advice or suggestions of methods to do this more accurately? How bad is it if the stiitches periodically over-extend the raw edge?

Thursday, November 4, 2010

Talk Back Thursday


Thank you so much to Katherine, Ivalyn, Julia, CarlaF, Shannon, Sarah, Sarah E, Mamafitz, Faye, Mary, Alison, Becky, Cindy, Summerset and Lisa Laree for talking back to my confession last week. I confessed that I’ve never entered a sewing competition, and asked about others’ thoughts and experiences about these contests.

So, do these commenters enter sewing competitions? Most people (7) reported that they have entered a few contests in the past. On either side of that, we had 4 “never” votes and 3 “regularly” votes.

And here’s a great one – we actually had 1 vote for “accidentally” ! Yes, Becky thought she was just posting some pictures to the BurdaStyle website, and discovered later that not only had she entered a competition, she had actually been one of the winners!

As for which contests are the most popular, there was a tie between the contests on PatternReview and contests at local fairs (state and county), with each getting 4 mentions. Pattern company sponsored competitions (Simplicity & McCalls) and 4-H competitions tied for second place, each getting 2 mentions. Other contests mentioned by one person each were: the Strasburg Children’s Costume Contest, the Julie Timmel SWAP and a BurdaStyle competition.

I also asked about the pros and cons of sewing contests. On the pro side, people mentioned that competitions can inspire, motivate, focus and even provide a little kick-start to your sewing. A couple of folks like having a deadline, in that it keeps them moving forward. And Lisa Laree really enjoys the camaraderie among “competitiors” that she finds on the PR boards.

On the con side, not everyone likes deadlines. Several folks said that they find competitions stressful, and the two major components to that stress appear to be (a) lack of time and (b) being judged and critiqued by others. Several folks reported that entering contests is inconsistent with their general approach to sewing for themselves and that competitions can take the joy out of their sewing.

What I thought was really cool was that several folks suggested a kind-of compromise perspective to sewing contests. Lisa Laree recommends only choosing to enter a competition if it is about doing something that you want to do anyways, and you just need a little nudge to push you into working on it. And Mamafitz and Summerset both recommended sewing for yourself, and making each piece the very best that it can be, and then, IF an appropriate contest comes along, entering your piece.

Thank you again to everyone who took the time and trouble to leave a comment! I enjoyed your stories and – whether it be a technical tip or an attitude adjustment – I always learn something from you! :)

Wednesday, November 3, 2010

In the Queue Wednesday

I had the opportunity to visit my friend Juana again last weekend. It seems that, other than a weekly grocery shopping trip, she's pretty much stuck in the house 24/7. So I took her and the baby out for lunch and a quick trip to - where else? - Joann's! ;)


She picked out this pattern for me to make for baby Alex:


Oh, by the way, she picked the union suit view with built-in feet. You know, the view that requires FOURTEEN snaps to be sewn on by HAND! Yikes! :(


And she picked this cute, stretch knit fabric:


I'm going to TRY to get it made before I see them again - probably within the next two weeks. In any event, I'll get to it - it's in the queue! :)


Tuesday, November 2, 2010

Tuesday's Torch Story

The object of education is to prepare the young
to educate themselves throughout their lives.
~ Robert M. Hutchins

One of my students is really struggling. And I mean REALLY struggling. I talked with her after class one night, and discovered that, as a young child growing up in Mexico, she attended school for exactly - brace yourself - one year.

Yes, that's right, ONE year. After first grade, at the tender age of 7 years old, her parents pulled her out of school and set her to work around the house and farm, to help take care of the family and, in particular, her younger siblings.

Forget English - reading and writing in her native tongue of Spanish is difficult for her! :(

Among other things, the weekly flash card homework was proving particularly impossible for her. So I decided to come up with an alternative. I purchased this big, bright children's book:


Each of the 14 pages has a theme and 7-8 illustrated words from within that theme. Here is the first page, for example:


With my husband's help, I recorded a CD with 14 tracks - one per page. For each page, I said the title (always in the center), and then each word (going clockwise from the upper left hand corner), three times. First in Spanish, and then in English two times. I left a pause in between each utterance that was long enough for her to repeat what she had just heard.

Her new weekly homework assignment is to learn the vocabulary on one page, by listening to the CD over and over again, until she can say the English words BEFORE I do.

Next week will be her first test (on page 1). I really hope this method works for her! (It certainly can't be any worse than the flashcards she was trying to learn up until now.)

Sometimes I look back on my early years of schooling and am disgruntled that I can't remember the dates of an important event in history or how to do a geometry proof. But my childhood education definitely accomplished one thing - I have been able to educate myself ever since... Working with this woman makes me realize just how lucky I am.

Sunday, October 31, 2010

Weekend Project: The Good, the Bad and the Adorable

Millions long for immortality who don't know what to do on a rainy Sunday afternoon.
~ Susan Ertz


I don't know about immortality, but I sure know what I'd do with a few extra rainy Sunday afternoons! Even though it didn't rain in central Florida this weekend, I did get a bit of sewing done. :)


The "good" is really quite miraculous for me - I changed the thread and the set up of my serger to do a cover stitch hem on my niece's dress, and it worked perfectly on my first practice run!


I'm not sure it's ever gone perfectly the first time! In fact, as I slid the scrap fabric under the presser foot, I was actually bracing myself for another 20 minutes or so of fiddling with the machine before I could start sewing the hem!


I have never been good at getting my cover stitch to line up with the raw inner edge of the fabric - like this:


And so this time, before sewing, I carefully measured...


and carefully pinned...


and carefully ironed...


And came up with this:


(the ugly)


Yup, once again, it's trimming time... It seems that there is some fundamental aspect to this task that I simply don't grasp. Sigh... :(


This weekend I also managed to whip out the 2 baby bubbles for Juana's new baby boy. This fabric was in my queue recently, so you may remember it:


The first has elephants on one side:


And monkeys on the other...


The second has dinosaurs on one side:


And soccer balls on the other...


Not bad for one weekend, huh? Of course, that's only if you don't think to ask about my progress (or lack thereof) on laundry, bill paying, grocery shopping, etc. ;)


So, I bet you thought that those baby bubbles were "the adorable" of my title, right?


Nope - we had visitors this weekend (the niece and nephew of a friend of Ana) and with the enthusiasm of children, they braved the chilly waters of our swimming pool:


And yes, those are blue lips. ;)


I don't think it gets any more adorable than this 4-year-old:


I hope you had a good weekend and a Happy Halloween! :)

Friday, October 29, 2010

Friday Confession


I have never entered a sewing contest.


It's not like I'm anti-competition. When my hobby was photography, I used to enter photo competitions - for example, at the State Fair every year...


But I haven't felt the pull to enter a sewing contest.


How about you? Do you enter sewing contests? If not, why not? And do you think you might someday? If so, why? And what was it like? Will you do it again? What are the pros and cons to competing?

Thursday, October 28, 2010

Talk Back Thursday


Thank you so much to BConky, Mountain Thyme, Lady Jenn, Katherine, Heather, Shannon, CarlaF, Cindy, Faye, Elaina, Mulliga M, Karin, Mary, Summerset and Angela for talking back to my last confession! I confessed that I’ve never sewn undergarments of any kind (well, okay, pajamas) and asked about others’ experiences.

Wow – Reader’s Digest Condensed Version – sewing undergarments is popular! We only had 4 “negative” responses, and 3 of those 4 said that undergarments are definitely on their list of things to try. In fact, Mountain Thyme just bought her first pattern – good luck! :)

On the positive side, here are the number of people who reported having made each of the following types of undergarments:
Underpants – 11
Bras – 6
Lingerie – 2
Slips – 2
Corsets – 2
Swim suits – 1
Camisoles – 1
Garter belts – 1
Other vintage undergarments – 1

While we usually get both pros and cons, everyone was pretty solidly on the pro side this time. The major pros mentioned for sewing your own underpants were:
It’s easy! (4)
It’s fun! (2)
They are quick! (1)

And for bras:
They fit better – especially if you are a hard to find size in RTW! (3)

A couple of folks also mentioned how much fun it is to work with silk & lace, and to make coordinated sets. :)

In fact, the closest we got to a “negative” was the challenge of finding good quality elastic.

Special thanks to CarlaF for pointing me towards this YouTube tutorial and Sigrid’s page of relevant tutorials.

Thanks again to everyone who took the time to respond! I’m feeling rather inspired and want to try to sew my own someday soon! :)

Wednesday, October 27, 2010

In the Queue Wednesday

I just received a new catalog from the Kansas Yarn Barn, and they have a number of beautiful weaving kits that are calling to me! Among other things, I am particularly attracted to a couple of their table runner kits.


First up is a table runner in the "log cabin" style that I used for my bathroom hand towels and rug (see this post for pictures). It's as if the weaving changes direction from length-wise to width-wise over and over again - I just love this visual effect!


My attention was also caught by this Christmas-themed table runner:


This style of weaving is called "monk's belt" - and there are many variations!

So, I'm not sure which of these table runners it's going to be, but don't worry, I'll weave one of them! It's in my queue... ;)

Tuesday, October 26, 2010

Tuesday's Torch Story

Alas for those that never sing,
But die with all their music in them!
~Oliver Wendell Holmes


As you know, a major part of my curriculum is learning songs. My hope is that this will teach vocabulary, pronunciation, the skill of translating AND be enjoyable for the students.


Just as a reminder, we start by listening to the song once. Then I break them into groups and assign each group a verse to translate into Spanish, using a dictionary. Once finished, each group presents their verse's translation to the rest of the class. That way, everyone understands the whole song. Finally, we practice reciting the words (for pronunciation practice) and then sing along with the CD.


I spent a lot of time over the summer, trying to come up with a dozen or so songs for us to learn. It was perhaps a bit of a Rorschach test for me, as I was selecting from songs that I am familiar with - but I tried to put aside personal preferences and pick songs that met the following criteria:
(a) contained a story line,

(b) contained a good selection of concrete & useful vocabulary,
(c) were not too difficult to sing,
(d) represented a variety of music styles,
(e) nothing inappropriate for a church setting and
(e) some Christmas songs for our classes around that holiday.


Here is my final list:


  • What a Wonderful World - Louis Armstrong
  • King of the Road - Roger Miller
  • If I had a Hammer - Peter, Paul & Mary
  • Blowing in the Wind - Bob Dylan
  • Put a Little Love in Your Heart - Jackie DeShannon
  • You've Got A Friend - James Taylor
  • Cat's in the Cradle - Harry Chapin
  • Forever Young - Rod Steward
  • Turn, Turn, Turn - The Byrds
  • What a Friend We Have in Jesus - Joseph Scriven
  • In The Garden - Charles Austin Miles
  • What Child is This? - William Chatterton Dix
  • Little Drummer Boy
  • Santa Claus is Coming To Town

I picked the first song that we would learn - What A Wonderful World. After that, I decided to let the students pick which songs they would like to learn next.


While this wasn't exactly a Rorschach test for me, I think it certainly has been one for them! So far, we've done "In the Garden" and "What a Friend We Have in Jesus".


I'm afraid that Bob Dylan and Rod Stewart are getting short shrift from this group! ;)


Informal querying has shown that they are very likely to recognize the English words in a song weeks after we learn it - and that's without (so far as I know) deliberate studying on their part. And they certainly seem to enjoy both the challenge of translating the songs and the singing itself.


In fact, speaking of the challenge of translating, they are quite willing to get side tracked with passionate debates over relatively minor issues and it is a challenge for ME to keep them on track!


For example, in our first song, there is the phrase "I see skies of blue..." and they argued enthusiastically over whether that should be translated to the singular (cielo) or plural (cielos). The majority of the class felt that there is actually only one sky, and so wanted to make the translation singular. It took all my considerable force of will to get them to agree to stick with the song writer's words, however deluded he might be... ;)


The battle I lost was from "In the Garden", which begins "I come to the garden alone." They refused to budge from the translation "Voy..." which actually means "I go..." The closest they would come to a compromise was to agree to write down in their notebooks that "venir" means "to come" and "ir" means "to go". ;)


Anyways, this activity is working out well. My main issue right now is that I have 3 women who have been friends for years, and who are slightly ahead of the rest of my students in their knowledge of English. They always want to be in the same group. And then their group always gets much more translated than any other group. I'd like to ask them to split up and help the others, but I'm not sure if I should or not... They do have a lot of fun together... Any thoughts?


Photo credit: shankar, shiv

Sunday, October 24, 2010

Weekend Project: The Mummy (the making of...)

Probably the saddest thing you'll ever see is a mosquito sucking on a mummy.
Forget it, little friend.
~ Jack Handy


So, my husband is not a big fan of dressing up in costumes. (Or, when you get right down to it, in anything...) But good friends invited us to a Halloween-themed Mystery Dinner Party at their house, and he agreed to go in costume. His assigned character was an Egyptian mummy, King Ahldrinktotat.


I offered to make a mummy costume for him, and knowing how he feels about costumes, decided to try to make one that was reasonably comfortable - not, for example, asking him to spend all evening with strips of fabric wrapped tightly around his body.


So, I figured I'd use an old bed sheet to "mummify" a t-shirt that he could just slip on and off. I rarely try to sew without a pattern, but decided to throw caution to the winds with this one! Maybe Anubis, the god of mummification, would grant me luck... ;)


I was lucky to have one good idea to start with. T-shirt material stretches. Bed sheet cotton doesn't. UNLESS you cut it on the bias... So, I cut up the old bed sheet into lots of 2-inch wide bias strips.


And then I lined them up...


And stitched them together to get a single, long stretchy strip of mummy wrapping.


Then I started at the bottom of the t-shirt and sewed the mummy wrapping around and around and around, working my way up to the underarms.


I repeated the process for each sleeve- starting at the sleeve bottom and working my way around to the shoulder seam.


During this process, the amazing advantage of working on a mummy costume became apparent - they are SUPPOSED to look messy! ;)

Next, I covered the neckline binding with more mummy wrapping.


I couldn't wrap around for the top part of the shirt, and so I made a dickey-like thing to slip over his head. Here is the front (not quite finished) - note the stylish detail of the inverted triangle front and center.


And here is the back.


Finally, here is the mummy, in full, comfortable regalia!


It was all a bit of trial and error, and I would be able to do a better job if I made a second one. But, overall I was pretty pleased. It was fun to work this out without a pattern or instructions. It wasn't too stressful, as mummies are supposed to look messy! And, the most important thing is that it was comfortable for my husband. :)