Goodbye, Jackson. You were the best buddy anyone could have hoped for. We were lucky to have you with us for almost 20 years, and we will all miss you very, very much. We love you and will keep you in our hearts forever...
"Yes, Virginia, there is sewing after the wedding dress."
All I have left to do is buttonholes and buttons. My husband picked red buttons. I'm pretty happy with the pocket - the lighthouses actually line up even a little bit better than it seems in this picture!


And here is her front pattern piece, after we finished it:

I would say that we found the instructions to be 90% crystal clear and 10% confusing. Between the 2 of us, I think we worked it all out, and I also think that we'll be able to draft my pattern pieces much more quickly - now that we've been through the process once.
It was a lot of fun - but have your calculator handy! There were lots of calculations. (It also helps to put together a chart showing the decimal equivalents of all of the eigths - 1/8, 2/8, etc.)
And it was a big week for Ana and Juana also. I had asked them to cut out the pattern pieces and pin them to the fabric by themselves, before our Sunday afternoon lesson. Each of them made a couple of small mistakes, but overall did a pretty good job. We re-pinnned as necessary and cut out the pieces first thing on Sunday afternoon. Then we got busy sewing!
Here is the fabric that Juana is using for the jacket. The main fabric is a bright red fleece, and the collar, cuffs and waist band will be in this darker red ribbed knit.

Juana was able to assemble the main body of the jacket and attach the pockets, collar, sleeves and cuffs in one afternoon. I think that she'll do the waistband this week on her own, and then we'll do the zipper together next Sunday. It's coming out really nicely so far!
And here is the fabric that Ana selected for her pajamas and matching robe. It is very soft and stretchy.


Ta-daa! I finally got to the dragonfly pillow project that was in my queue! As you may remember, I saw the fabric last February at the Sewing and Quilt Expo in Tampa, and bought some because I have a friend who absolutely loves dragonflies.
Here is the lay out of the fabric pieces for each side of the pillow:
Let's just take a moment and pretend that this attractive layout was, in fact, my plan from the very beginning...
Ah, wasn't that nice? Now, for the truth. I purchased one yard, intending to make one pillow case for Ani. Then, another friend of mine, Allison, saw the fabric and commented on how much she liked it. So, I decided to make two.
Alas, I didn't have quite enough fabric to completely cover both pillows. It occured to me that I could cut four square pieces and add a small border around each (like a picture frame) to make the squares large enough to cover the pillows. The border would add a nice decorative touch.
I searched my stash and found a solid that blended quite nicely. I used my new rotary cutter to cut strips - two inches wide and the same length as the sides of the squares of the dragonfly fabric.
Those of you with experience piecing quilts already realize exactly what that means. That means that I had square gaps at each corner, where my border strips didn't extend far enough..
A quick trip back to the drawing board and I realized that I had enough leftover of the dragonfly fabric to add corner boxes, 2 inches by 2 inches. Thank goodness!
So, the road was a bit circuitous, but the end result is nice. ;)
A few miscellaneous details. Real quilters sew with 1/4 inch seams and iron open. I used 5/8 inch seams, pressed them open and then top stitched them open.
My first seams created three pieces of equal length (but different widths):

Next I connected those three pieces to create one front face.

I did the same for the back, except that I added an invisible zipper, so that the pillow case can be removed and washed periodically.
I had to mail one to Ani, and haven't heard yet how she likes it. But Allison loves hers!
I think I'll make view A (short sleeves) of this top:

My goal is her birthday, which is near the end of September, so I'll have to get moving on this one! Don't worry, I'll get to it... It's in the queue. ;)

They are really special young women - I can't begin to describe how much joy it has brought to my life to spend time with them. :)
She is actually making view A below (not being modeled by either boy above). She picked a red fleece and matching red ribbed knit.
and the robe (minus the hood) and long pants from this pattern:
Then Abel...
As I think you will be able to tell from these photos, everyone agreed that this project was a complete success! :)
I finally got around to making my "quality check" pair of adaptive pants for the organization "Sew Much Comfort". As you may remember, this organization seeks volunteers to sew clothes that wounded veterans can easily put on and take off over medical "devices", such as casts and braces.
In general, they went together well, but it is a little bit unnerving working on a project that you know is going to be judged by experienced sewers...
As you can see from this layout, the adaptive pants have one "normal" pant leg and one extra wide pant leg to accommodate a medical device.


Next they ask you to attach their label on the center front of the pants.

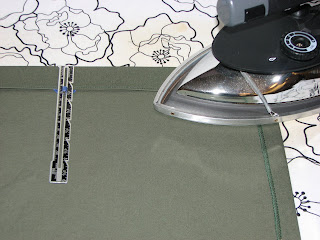
Then, you form a facing on the two sides of the adaptive leg by folding and pressing the fabric.

Next, you make the casing for the elastic waist band,

insert the elastic and attach near each end.
The next step is to add hook and loop tape along the two edges of the adaptive pant leg. The instructions describe the "x in the box" stitching method to reinforce the hook and loop tape at the top and bottom.

The instructions direct you to put the soft (loop) tape on the inside of the front pant leg and the rough (hook) tape on the outside of the back pant leg, so that this opening doesn't show from the front.

and a snap. (Sorry for the blurry picture.)
My husband graciously modeled these 'shorts' for me (even though they aren't really a good fit for him.)
They seem pretty long for 'shorts' to me, but the instructions specify a 15 inch inseam measurement.
Back view - you can see the seam on the adaptive pant leg.
Not very exciting, but I guess that's kind of the point - nothing fancy, just ordinary looking clothes that veterans can actually put on over casts and such.
I'll let you know whether or not I pass my quality check. Keep your fingers crossed for me!

I picked a fun font, instead of a flowing, graceful font, because most of my sewing is bright, happy and fun. (Think Hawaiian shirts, wild outfits for kids, summer sundresses, etc...)
So, what do you think? Do you like it? And how about you? Do you put labels in the clothes that you sew? What do your labels look like and where do you get them?
Thanks to Carolyn, Donna, mamafitz, toni, Vicki and Claire for "talking back" to my Friday Confession a couple of weeks ago! I confessed that I don't always read the sewing books that I buy as thoroughly as I should... It sounds like most people are better than I am at reading their books through, at least once, pretty much cover-to-cover.
Almost everyone agreed that having a library of reference books available for help with new or difficult projects was invaluable. One slightly different perspective was offered by mamafitz, who doesn't buy many sewing books, and prefers books of sewing projects and text books on topics like pattern making, over general reference books.
Donna is incredibly disciplined (in my mind) and regularly purges her library of books that haven't proven useful, in order to make room for new purchases. (And here I was just bracing myself for a move to a bigger house!)
One thing is certain, lifelong sewers are lifelong learners - always pushing, always growing...
Thanks again to everyone who responded! :)


As we were setting up Ana's machine to sew the buttons onto David's shirt, I managed to generate a multi-sentence monologue about how normally the fabric moves when you sew, but when you are putting on buttons you don't want the fabric to move... etc. All leading up to showing her how to drop the feed dogs.
All this time, Juana was still working on her buttonholes, and so she missed it all. A few minutes later, when Juana was ready to attach her buttons, I asked Ana to explain it to her - figuring that Ana would be more coherent than I had been.
Ana pointed to the feed dog switch and said "normal" and then she pushed the switch into the other position and said "boton".
Enough said... ;)
Note the contrasting inside button band. :)
And here is Juana's (Abel's) shirt with the collar completed:
One nice thing about the pattern - the sleeves went in perfectly! No need to adjust with basting stitches. That was a pleasant surprise! Speaking of the sleeves, they are double thickness. The inner layer is the alternating fabric, so if David rolls up his sleeves, the light green ("woof") fabric will become his cuffs. (Sadly, I did not think this part through carefully, and the lettering on the cuffs will be upside-down...)
©2009 After the dress... | by TNB